Reverse DNS
VirtFusion has two modes for reverse DNS. The first is Manual Mode and the second is Automation Mode.
Both modes give the same end user experience, however, manual mode will be a request to an administrator to update the reverse DNS entries manually.
Manual Mode
The idea behind manual mode is that sometimes it may not be possible to automate reverse DNS. i.e your service provider may only take manual requests for the changes, or they can't delegate the zone to you.
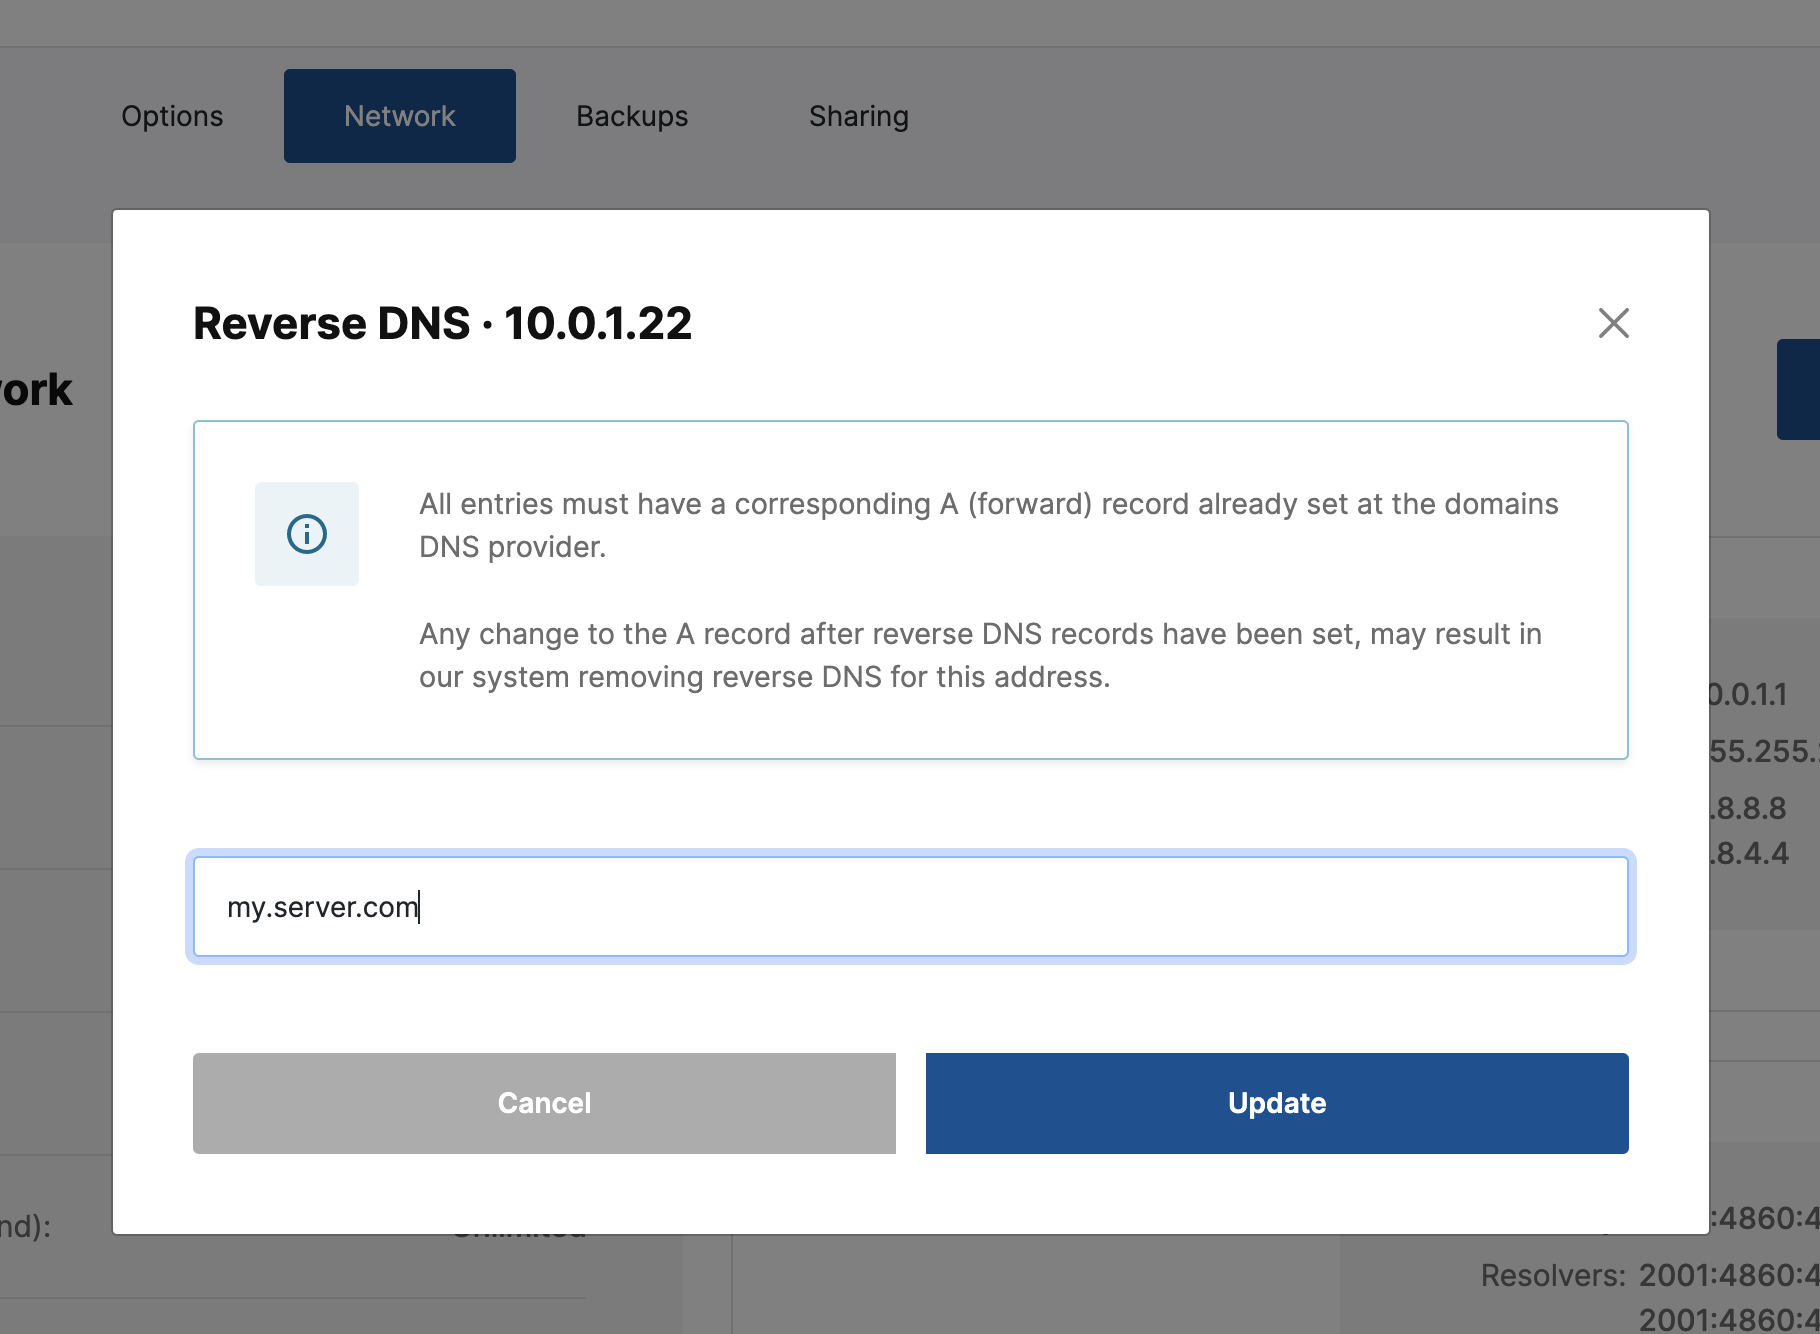
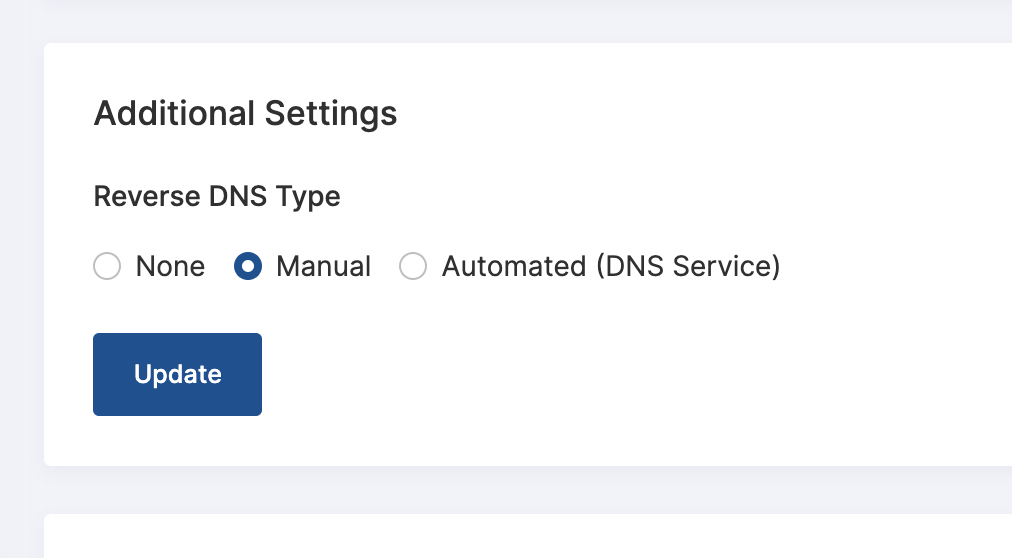
To use manual mode, it must be enabled on the IP Address Block.
Once it's enabled, an end user can make requests for IPs within the block you enabled manual mode on.
After the user has made a request, An email will be sent to administrators on the system alerting them of a pending request.
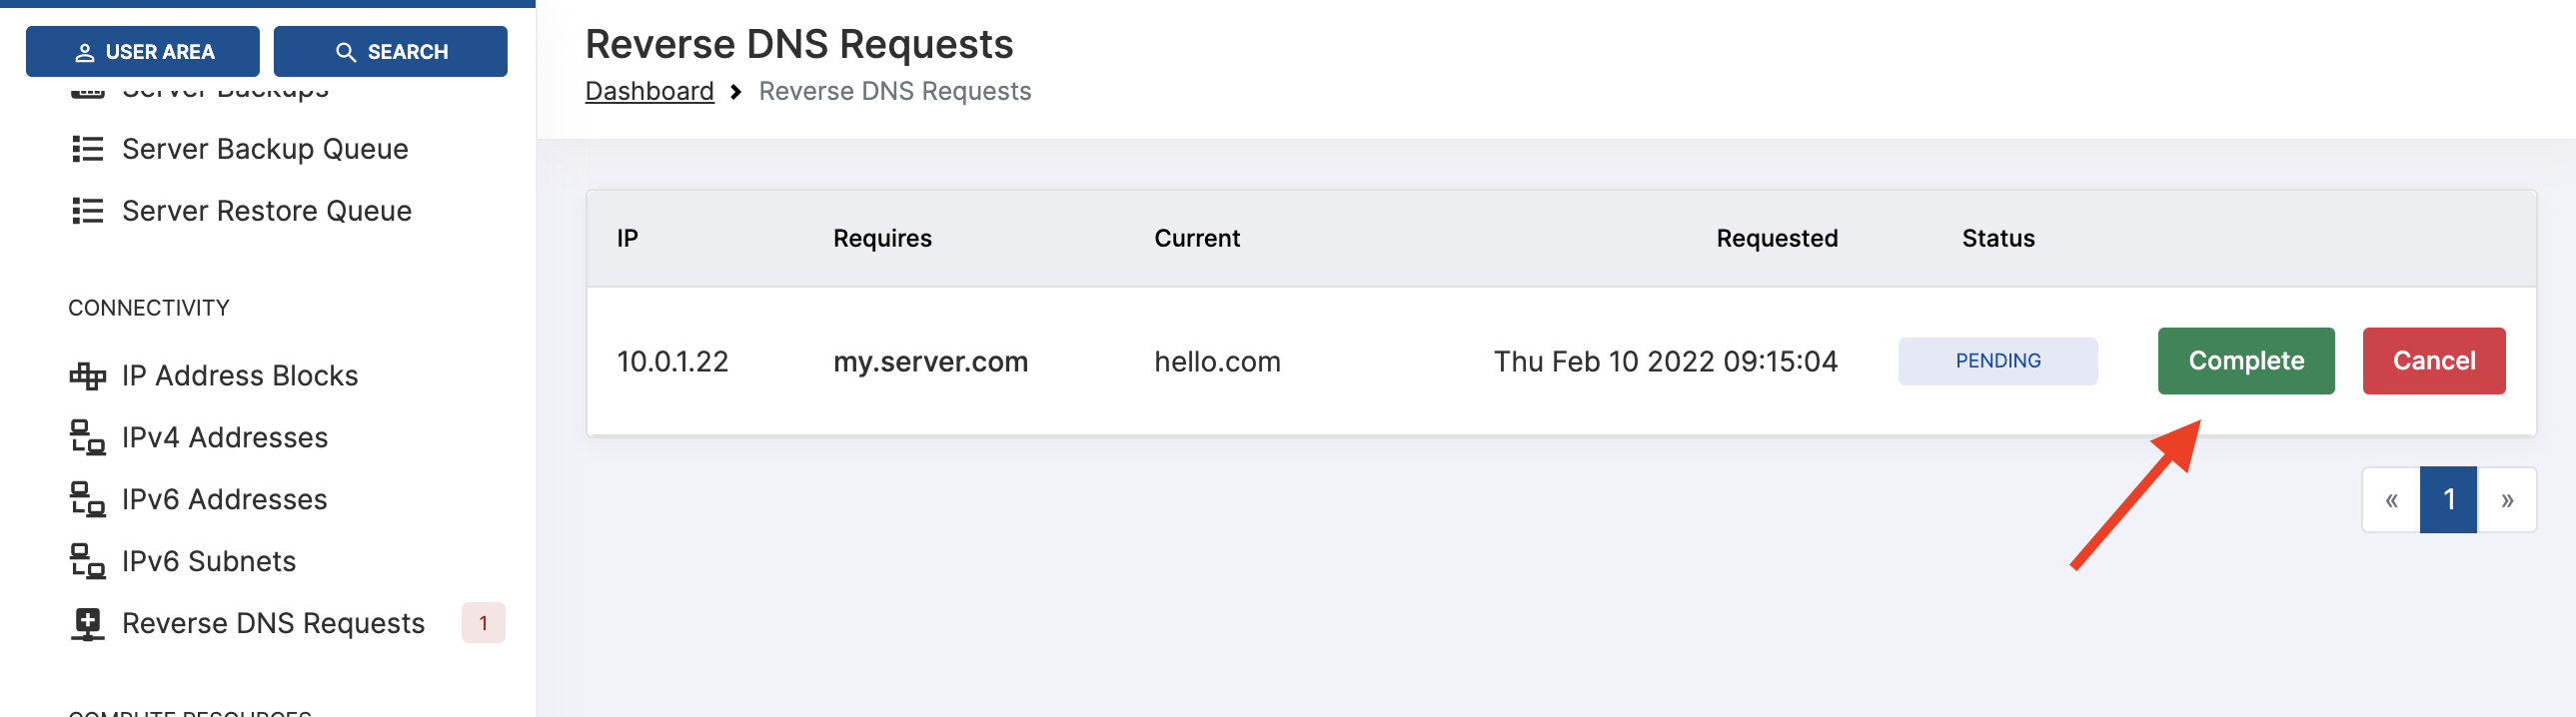
Within the admin area navigate to Reverse DNS Requests from the main menu.
You can view the request and run actions against it. If you don't approve the request, click the Cancel button. If you've approved the request and set up the reverse DNS entry, click Complete.
Once you've selected your action, the buttons will change to the following.
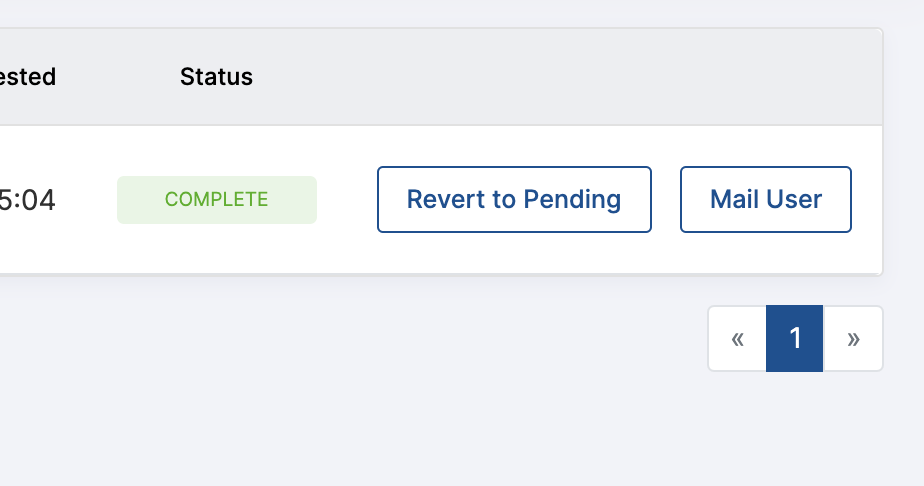
You have the option to send the end user an email that the request has either been approved or not and an option to set the request back to pending if you have made a mistake.
Be aware that requests in the complete state will not be shown in the list after 2 hours have passed.
That's it - There is nothing more for you to do after you've approved or cancelled the request.
Automation Mode
Automation is a little more complicated to setup and configure. Currently, automation supports ClouDNS, PowerDNS and Bunny DNS.
Automation with ClouDNS
ClouDNS is a low-cost premium DNS hosting service with a global Anycast DNS network.
You must have an active paid account at ClouDNS to continue.
Login to your account at ClouDNS and generate an API user (Resellers menu option). You should end up with an auth id and password. Save them for later.
Once you have your API details, Navigate to DNS Services in the VirtFusion admin area and click the Add Service button.
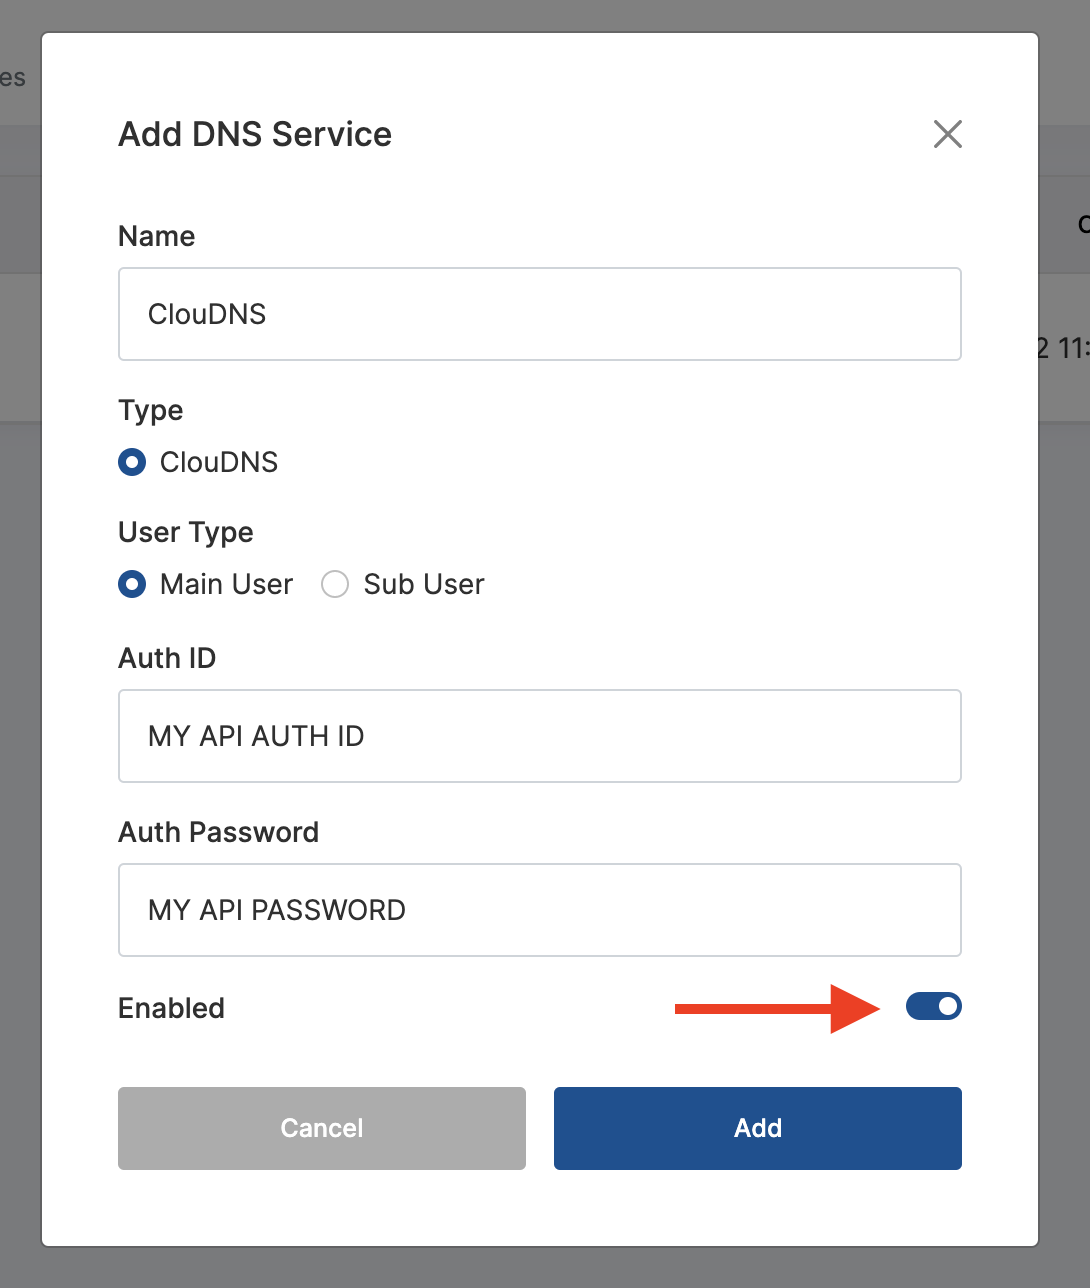
Fill in all the details and add the service.
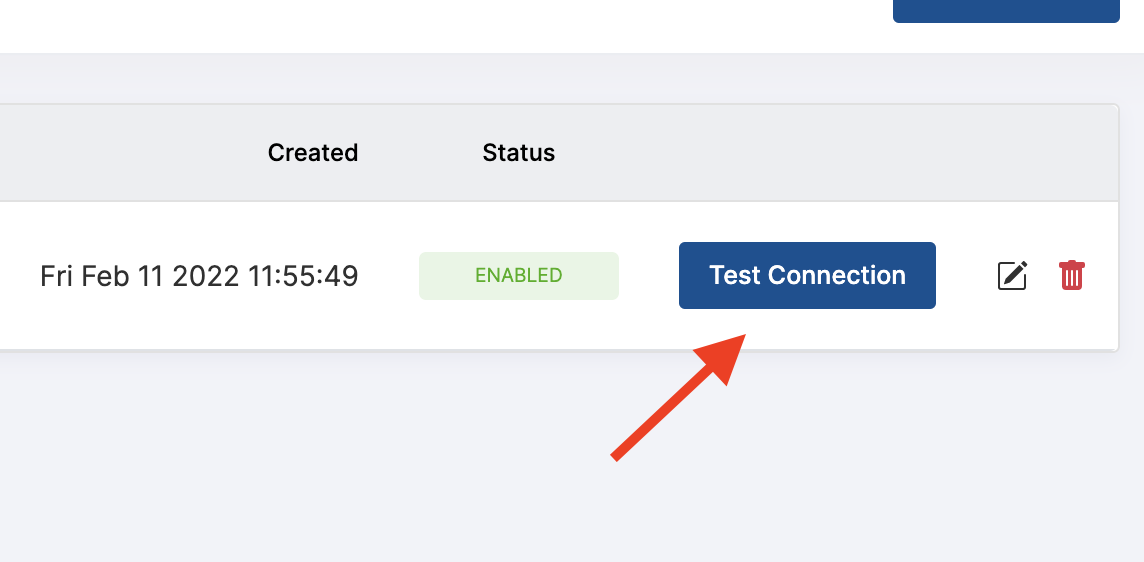
After adding the service you may test the connection to make sure that all details are correct, and you have access to the ClouDNS API.
Next we need to add a reverse DNS zone (in VirtFusion).
Select Reverse DNS Zones from the main menu and click the Add Zone button.
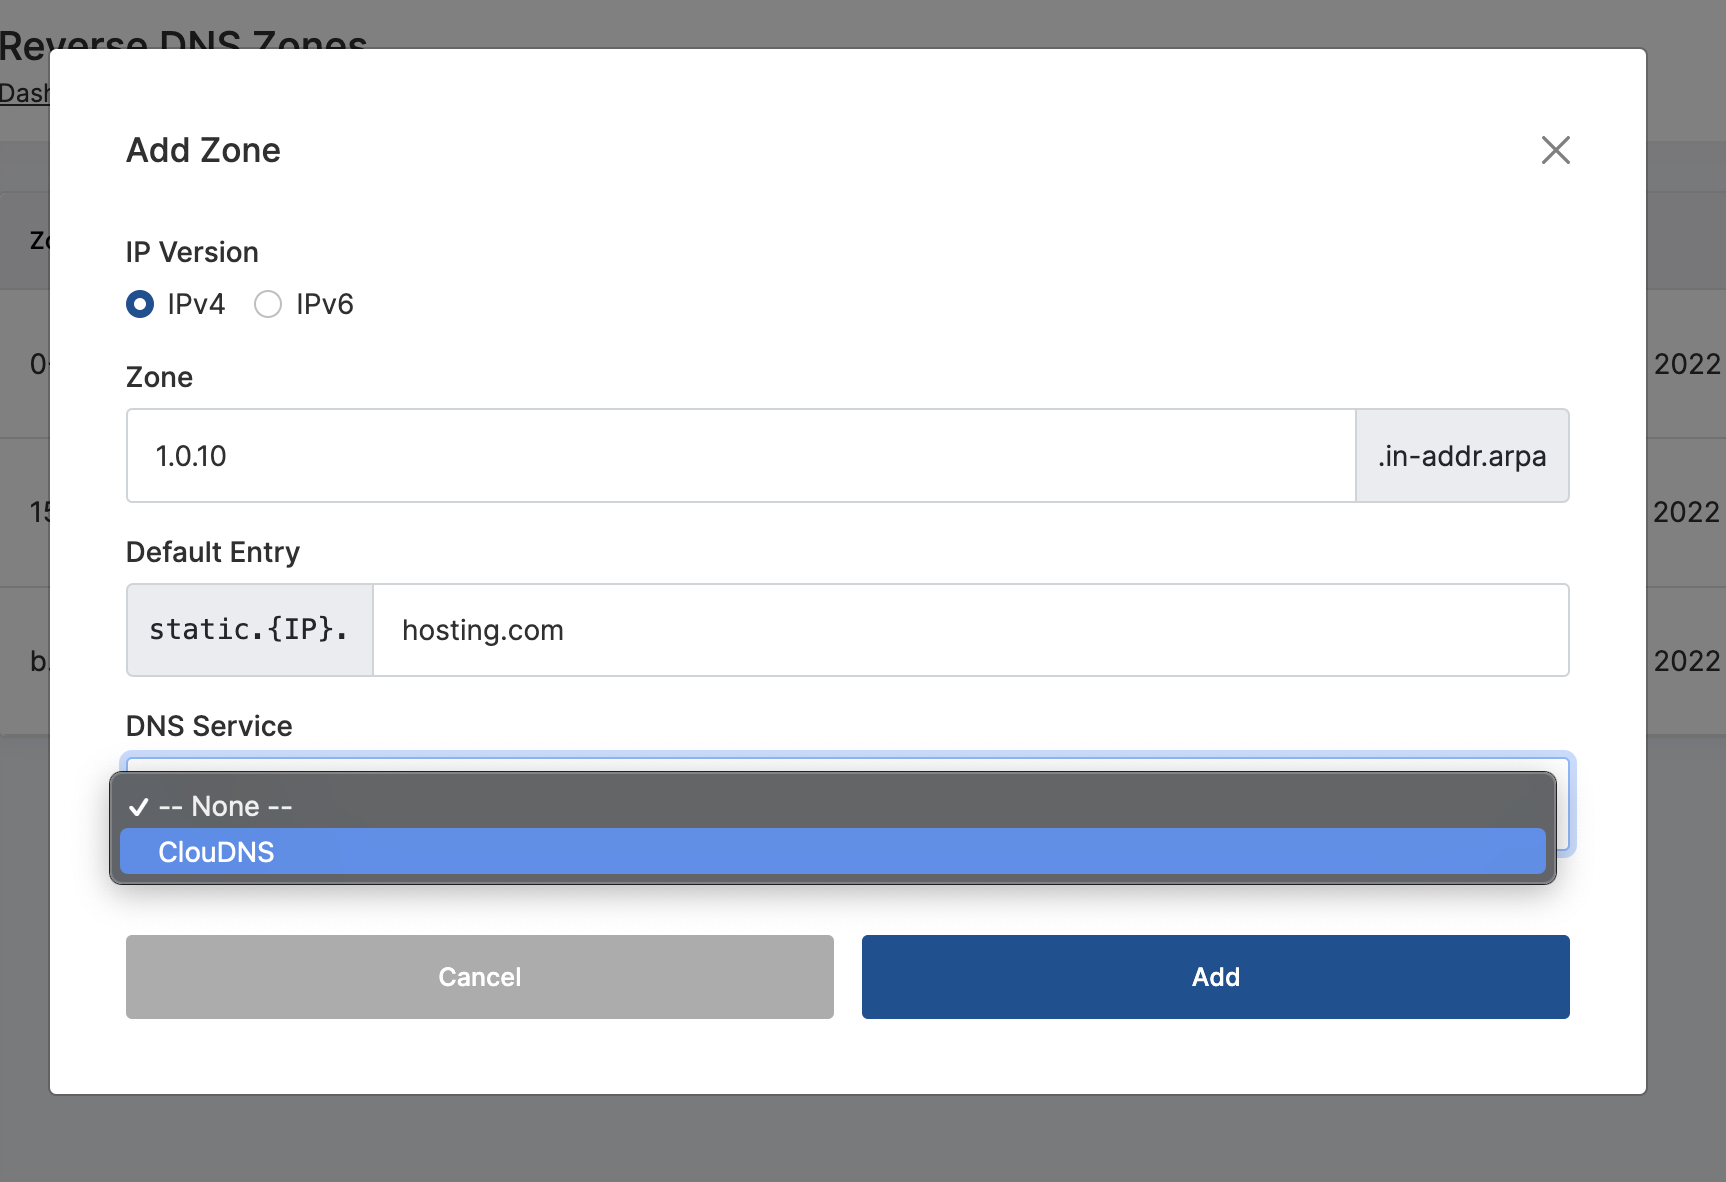
- Select the
IP Version - Fill in the
Zonedetails Default Entryis only used for IPv4 and is optional. Leave blank to disable it- Select the
DNS Serviceyou just created
Once added, Navigate to the IP Address Block that you have created this zone for.
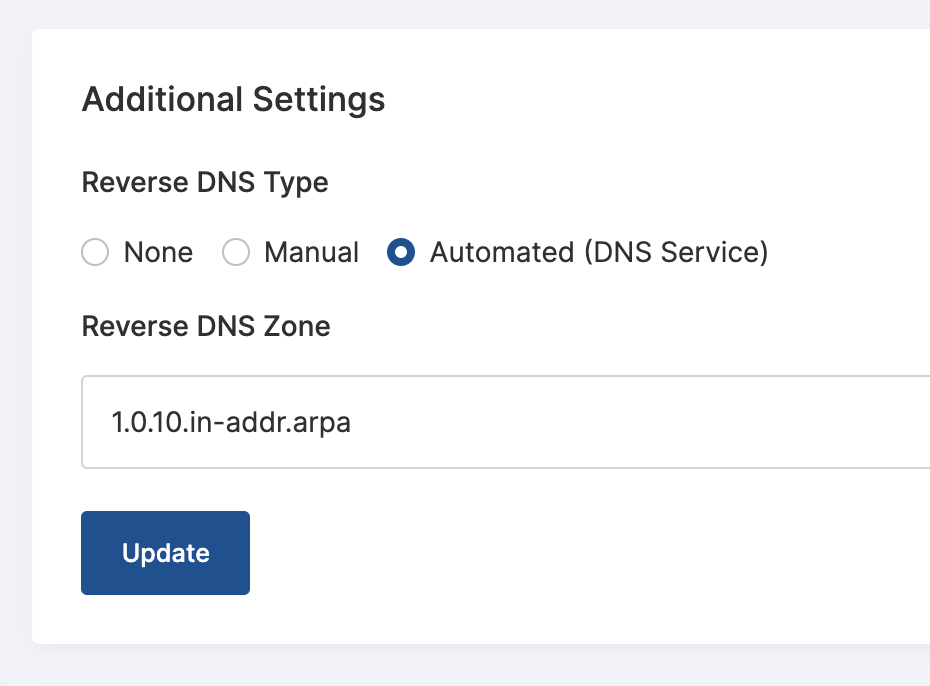
Click Automated (DNS Serivce) and select the zone you just created. Click the Update button.
That's it, Automation is now setup. The first DNS entry will create the zone in ClouDNS or if you navigate back to the Reverse DNS Zone you created and click the Rebuild button.
If you would like to manually insert reverse DNS for an IP, you may do so by visiting the IPv4 or IPv6 Addresses menu item and editing the reverse DNS (+RDNS in the list).
You will need to rebuild the zone after making these manual changes.
Automation with PowerDNS
You are responsible for setting up your own PowerDNS cluster with API access.
VirtFusion will communicate with PowerDNS via API and requires a URL, port and API token.
Navigate to DNS Services in the VirtFusion admin area and click the Add Service button.
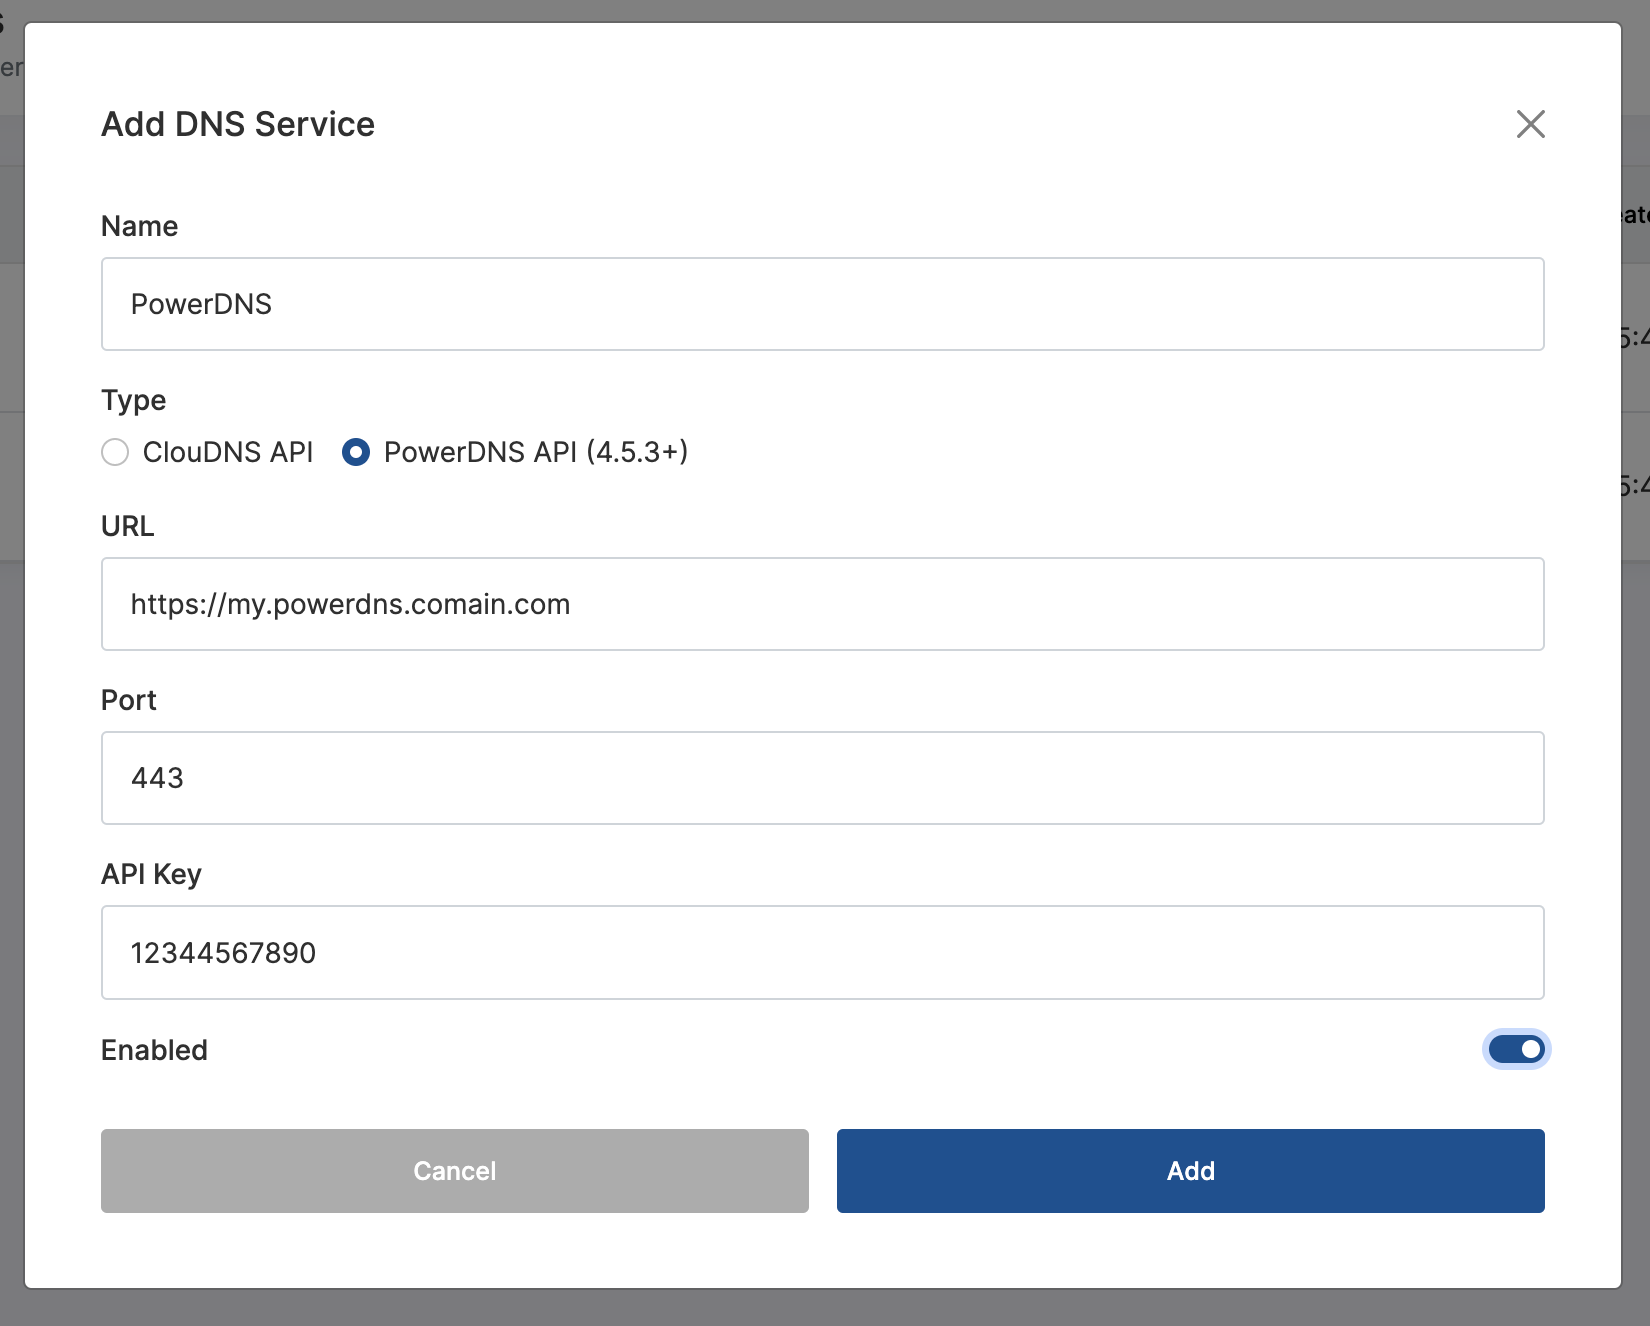
Fill in all the details and add the service.
After adding the service you may test the connection to make sure that all details are correct, and you have access to the PowerDNS API.
Next we need to add a reverse DNS zone.
Select Reverse DNS Zones from the main menu and click the Add Zone button.
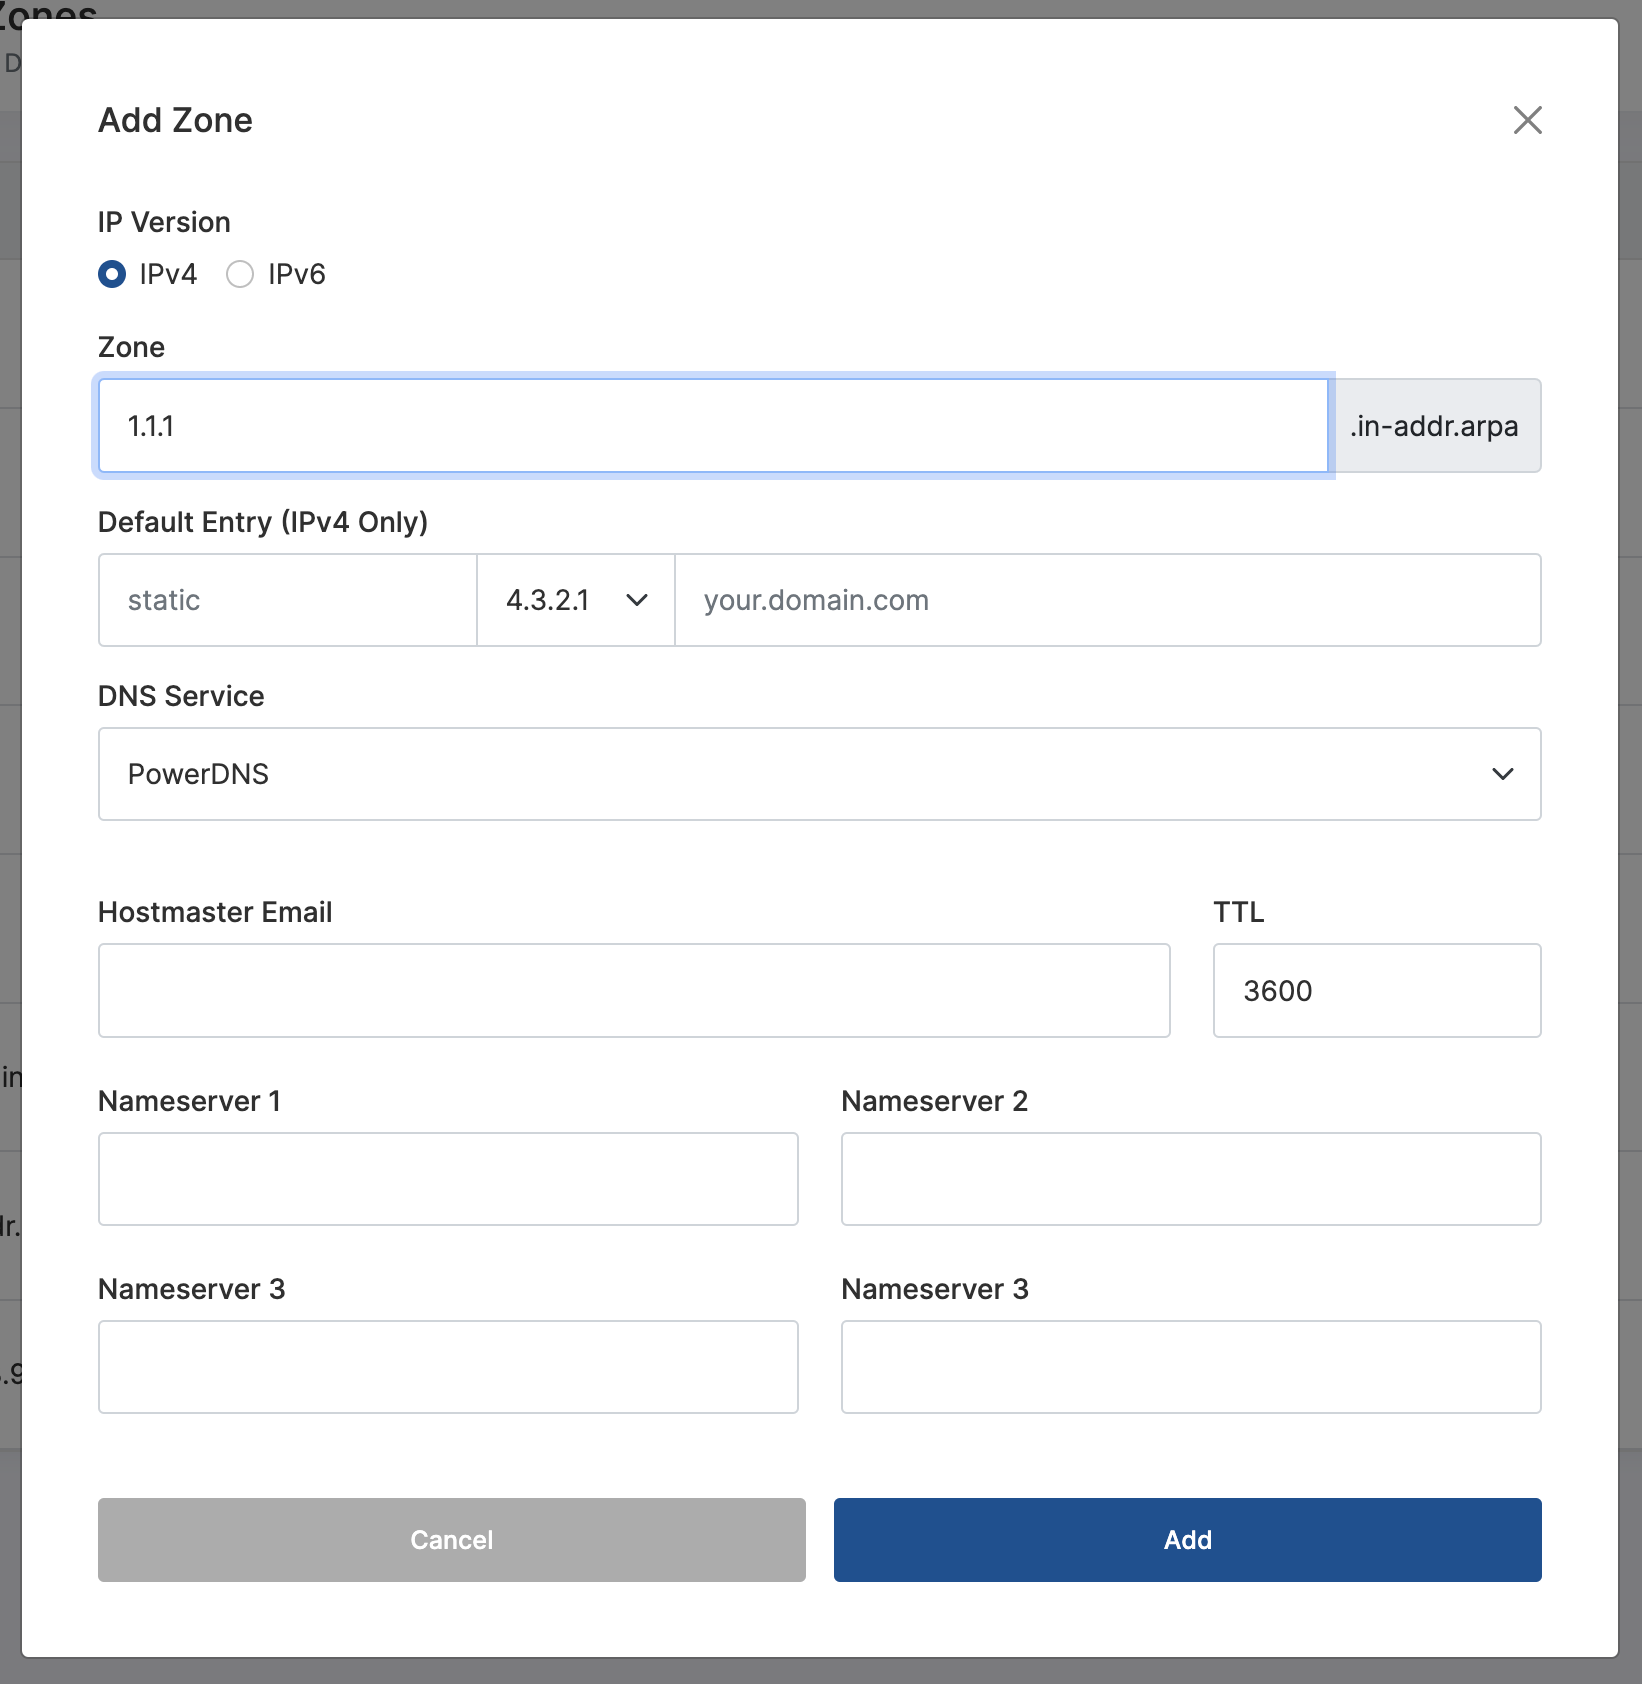
- Select the
IP Version - Fill in the
Zonedetails Default Entryis only used for IPv4 and is optional. Leave blank to disable it- Select the
DNS Serviceyou just created - Enter a
Hostmaster Email - Enter at least two
Nameservers
Once added, Navigate to the IP Address Block that you have created this zone for.
Click Automated (DNS Serivce) and select the zone you just created. Click the Update button.
That's it, Automation is now setup. The first DNS entry will create the zone in PowerDNS or if you navigate back to the Reverse DNS Zone you created and click the Rebuild button.
If you would like to manually insert reverse DNS for an IP, you may do so by visiting the IPv4 or IPv6 Addresses menu item and editing the reverse DNS (+RDNS in the list).
You will need to rebuild the zone after making these manual changes.
Automation with Bunny.net
Important Information
- You do not need to create the RDNS zones in the Bunny.net control panel.
Zoning IP Blocks
You can create an IP block of any compliant size; however, the largest size supported for an RDNS zone is a /24.
VirtFusion allows you to subdivide your IP blocks and assign individual zone files to each sub-block.
Create a Sub Block
- Navigate to your IPv4 block and select the
Generaltab. - At the bottom of the page you will see an option called
Sub Blocks. Click theAddbutton. - In the pop up, enter a
Name, select theReverse DNS Typeand select the relevantReverse DNS Zonefor the portion of the IP block you would like to assign. - Click the
Addbutton to save it.
Adding Addresses to a Sub Block
- Click the
Addressestab at the top of the page. - Select (tick) all the addresses in the table that you would like included in the Sub Block.
- At the bottom of the screen, click the
Assign to Sub Blockbutton. - In the pop up, select the Sub Block and click
Assign